Breaking News
Loading...

Recent Post

Showing posts with label Android. Show all posts
Saturday, April 12, 2014
Find your lost Android device with Android Device Manager

Find your lost Android device with Android Device Manager


Find your lost Android device with Android Device Manager :-
Your Android Smartphone have all important contacts, emails, personal images and many other important things. Have you ever think about what happened when you lost of your phone or someone stolen your android phone ? Your valuable information is in the other hand. However in my previous article i wrote about How To Encrypt Your Android Phone but this thing is not the full solution.
if you lose your Android device associated with your Google account, you can use Android Device Manager to remotely locate and factory reset your phone or tablet.
Open your Google Settings in your Android phone.

Now tap on the Android Device Manager.

now it will open your Android Device manager windows. After Enable this option, you are able to Erase all your data , Change the Screen-Unlock Password and Lock the Screen. Click on the Activate option to activate this option in your Device.

Now choose both option “ Remotely locate this device " and "Allow remote lock and factory reset” .

Sign in to your Google Account on https://www.google.com/android/devicemanager. If you’re using a Google Apps account, you will sign in to your My Devices page.

Presently i am in Bhubaneswar (India) and it's showing my correct location on my android device manager.
Now here i have the option to Ring my Device for five minutes in full voulme , Lock and Erase my device data.
Tuesday, February 25, 2014
Get Timely Notifications When Your Facebook friends are online!!

Get Timely Notifications When Your Facebook friends are online!!


Buddybuzzer

Description:
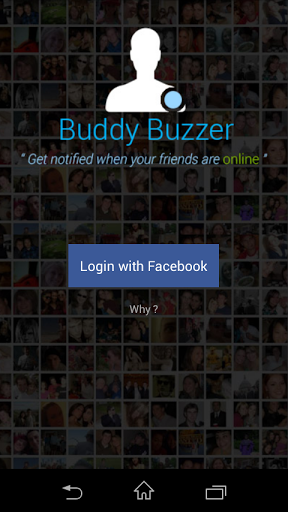
Never miss a chat with your Loved One's again. Buddybuzzer is a fun social app which keeps track of online activity of your Facebook friends. You get timely notifications when your dear ones are online.
IN YOUR LIFE:
★ Get rid of frequent checks on messenger, we'll take care of that
★ Concentrate on your work, those are important too
★ Your concerns are only yours. We've perfect ways to keep it that way
★ Take a break with confidence, we've got you

KEY FEATURES:
★ Favorite friends — Mark your dearest friends
★ Ring Notifications — Make your phone ring when your special ones are around.
★ Personalization — Set aliases for your friends so that only you get the notifications right
★ Control — Choose when to monitor and when not to

Screenshots:


DOWNLOAD 

Saturday, February 22, 2014
WhatsApp now lets Android users hide their 'last seen at' timestamp. Here's how

WhatsApp now lets Android users hide their 'last seen at' timestamp. Here's how

Popular mobile messaging application WhatsApp, that is now being acquired by Facebook, has included a much-requested feature - the ability to hide the 'last seen at' timestamp.
This feature was so longer available only on WhatsApp for iPhone and was a much desired by many on other platforms who do not want to display to other users information about when they last used the app.
Users can now choose if they want to display their last seen status to everyone, only to their contacts or to nobody.

The new WhatsApp update also includes the ability to limit visibility of profile photos and status.

The new update also includes the ability to limit visibility of profile photos and status.
The update that includes these features isn't, at the time of posting this, available on Google Play but WhatsApp is expected roll this out soon.
If you wish to get the new privacy features on WhatsApp, go to the WhatsApp official website and Download the Android app from there. You might have to change your Android security setting before able to install this.
Once you have installed the app, open WhatsApp, tap on settings from the menu, then go to Account and there you will find a new option 'Privacy' added atop other existing options. The new features can be used from within the privacy settings.
This also means that if you have chosen to hide your 'last seen at' timestamp, you will also be unable see others'.
Friday, February 14, 2014
Norton™ Mobile Security Free iOS / Android + 5 GB Cloud Storage

Norton™ Mobile Security Free iOS / Android + 5 GB Cloud Storage


Norton is Offering FREE Mobile Security for Mobile Device , Android & iOS , Just Select 1 Yr License worth Rs. 580 FREE . Also you have to add your credit card details but don't click on non renewable license option. You can also Get 5 GB Norton Cloud Storage FREE from Norton Zone 
How to get Norton™ Mobile Security Free IOS / Android  + 5 GB Cloud Storage :
​​Product Details :
  • Powerful protection for your mobile world and the Stuff in it
  • Compatible with Android™ smartphones and tablets, iPhone® and iPad®
  • Instantly pinpoint your missing device on a map to help you find it fast
  • Back up and restore your contacts across your devices
  • Help protect Android devices against potential privacy risks, malware and phishing
Friday, December 6, 2013
How to Installing BusyBox on Non-rooted Android Devices

How to Installing BusyBox on Non-rooted Android Devices


Today in this post i am going to discuss about how to install busybox on non-rooted android devices.  If you have a rooted android phone and utilizing it to the fullest, then in all probability your device is generation before non-rooted android device.  As a matter of reality, majority of android users are having non-rooted device and positively this snatch the chance to use BusyBox on your android device. BusyBox allows you to more additional linux commandson on your android devices. Busybox provides many unix tools in a single file. It runs during a type of POSIX environments like UNIX (including Android), FreeBSD and others, like kernels, though several of the tools it provides square measure designed to figure with interfaces provided by the UNIX kernel..!

Cover art


Requirements :
  • 1. Android device running on version 1.6 or higher
  • 2. Download BusyBox Non-Root App on your android device

Downloading and Installing :
After download & Installing this BusyBox Non-Root App, you need to follow these below steps,

  • Step 1) First of all, open this app.
  • Step 1) Click on Install Busybox and you need install all files include binary files.
  • Step 3) After installed, click on Busybox location and it'll copy the path to your writing board to form it simple for you to induce to them.
  • Step 4) Now open your Terminal and alter directory to the path you have copied.

[[APP]]2Lines for WhatsApp ★ ROOT

[[APP]]2Lines for WhatsApp ★ ROOT

Description
*** THIS APP NEEDS ROOT PERMISSIONS ***
Do you have several mobile phone numbers? Do you own two Whatsapp accounts and carry them on different cell phones?
Two Lines for Whatsapp allows you to use Whatsapp with different mobile phone numbers on the same device!
2 Lines for Whatsapp will save every Whatsapp account info you have and restore it automatically when you switch from one to another without needing registration or waiting for SMSs every time.
USE ON YOUR OWN RESPONSIBILITY!! Chorrasoft won't take responsibility for any lost or corrupt data on your Whatsapp app.

SCREENSHOTS:


Video:

How to Use Simultaneously Wifi and Mobile Data for Faster Download

How to Use Simultaneously Wifi and Mobile Data for Faster Download


Today, i'm talking about how to use simultaneously Wifi and Mobile Data for Faster Download.

if you are just not satisfied with the internet speed you are getting from your service provider and do you want feed up of your WiFi/3g/4g connectivity? As a human mentality, we always need more and more and the bandwidth we are getting from service providers is no exception to it. Some or the other day, you might have thought of using Wifi and mobile data simultaneously. Isn’t it? Probably Yes. As you know, generally it’s not possible because as soon as you turn on your WiFi connection, your mobile data got disabled.

Before you begin, you need :

  • 1. A Rooted Android device version 2.2 or up. 
  • 2. Super Download app installed on your device.Download free form Google Play Store.
How to Use Simultaneously Wifi and Mobile Data for Faster Download:

  • 1. Just click on a link or open a remote file: if the file type is recognized by Super Download, it will start getting it. 
  • 2. If this method doesn't work, try click-and-hold on the link, select “share with” and choose Super Download. 
  • .3 Finally, you can copy and paste a URL in the “add URL” dialog. You are now all set to speed up your download.

Things to Remember while Using the Application:

  • 1. Using both networks together requires root access (remember to say “authorize” to the superuser prompt).
  • 2. Since this program uses mobile data connection, by using it you may incur in additional charges from your network operator.
  • 3. To unleash its full potential, this turbo downloader needs good (and balanced) wifi and mobile reception/bandwidth. If you have good wifi internet, 2G mobile is not enough, you need 3G or 4G.
  • 4. Using both connections is not supported on all devices / rom combinations.
  • 5. Some web servers may provide insufficient functionalists on the requested files.
  • 6. Currently only http and https protocols are supported (no ftp or torrent yet)
  • 7. The Lite version has a file size limit of 50 megabytes.
Download and Run Backtrack 5 on Android Devices

Download and Run Backtrack 5 on Android Devices

Hello Friends, today i'm talking about how to download and run backtrack 5 on android devices.
BackTrack is a Linux-based penetration testing arsenal that aids security professionals in the ability to perform assessments in a purely native environment dedicated to Hacking.


Download and Run Backtrack on Android Devices:

Requirements:


  • 1. Rooted Android Device with Busybox Installed.
  • 2. Download some apps from Android Market like Android Terminal Emulator and androidVNC.
  • 3. 7zip (for PC), for extracting the files around 3.3 GB free on internal sdcard (/sdcard/)
  • 4. Download Backtrack from here.

File Setup:

You need to do this only once,

  • 1. Download the files from the links provided in this thread.
  • 2. Extract the files using 7zip to a temporary folder (needs 3.3GB free on that drive)
  • 3. Connect your SGS2 to PC and mount USB storage.
  • 4. Create a folder named 'bt' (without quotes) in the root of your sdcard and copy the bt.img in that folder.
  • 5. Also place the file bt5_sgs2_shell_scripts_v2.zip in root of sdcard, this file has to be flashed via recovery.
  • 6. Once you verify that the above is correct then un-mount usb storage.
  • 7. Reboot into recovery and flash the file bt5_sgs2_shell_scripts_v2.zip stored in root of sdcard (or if you are using 4 app then just select the file for flashing and the app will do the rest)
  • 8. once ur phone reboots into OS just check the /sdcard/bt folder.
  • 9. Final directory structure should look like this:
  • /sdcard/bt/bt /sdcard/bt/bt.img /sdcard/bt/installbt.sh /sdcard/bt/startbt /sdcard/bt/stopbt
  • 10. Once you verify that the above is correct then you can proceed.
Launch BackTrack 5:


 1. Start Terminal Emulator app on your SGS2 and enter the following commands step by step (accept/allow any SuperUser request/popup that you may receive)
su
cd/sdcard/bt
sh installbt.sh
startbt
bt

2. Now you are in BackTrack5 shell.

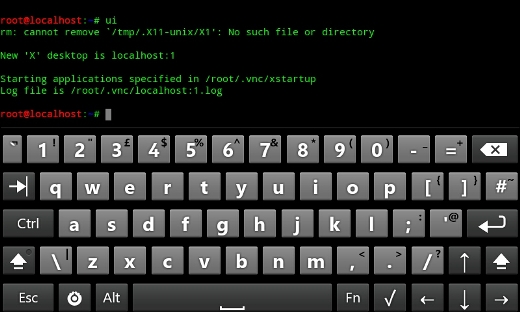
3. To launch GUI (vncserver) enter the command ui.


now note the number N shown localhost:N
e.g. as u can see from the above image that "New 'X' desktop is localhost:1", so N=1
the vncserver is running at (5900 + N, N=1 ; so server port is 5901)

4. Now launch androidVNC app on phone and fill in the detials as follows:
Nick : bt
Address : 127.0.0.1
Port : 5901
Password : 12345678
Username : <leave it blank>
Color Format : 24-bit color (4 bpp)

Inside vnc window select input mode (i personally recommend the following)
TouchPad (here your screen works like a big touchpad use it to navigate mouse.)

5. Then press connect, now you are in BackTrack GUI!

6.if you want to exit/close BT5 then u need to follow these steps:

close the androidVNC app (Menu > Disconnect)
Go back into Terminal Emulator app and enter the following commands
you should be at this shell root@localhost:~#
killui
exit

now you will get back to this shell> #
now enter the following commands to stop bt and exit
stopbt
exit
exit

you can now exit the Terminal Emulator app
i would also recommend that u reboot your android phone.
Monday, December 2, 2013
Google Play Music now available for iOS

Google Play Music now available for iOS


Apple and Google are arch nemesis but it seems like Google is rather helping with the development of iOS and thereby Apple. Google is developing more apps for Apple and instead of saying developing, they are porting their apps to the rival platform. Google is not developing for Windows Phone alone. Its like all the companies are helping each other but leaving Windows Phone behind.
Google even released its Google Maps service to the iDevices. It even replaced the native Apple Maps for a period of time. The turn by turn navigation, Accurate location finder, etc. compared to Apple maps which couldn’t accurately pin point your location. People were very angry when it lead to some other place when you asked for a place in the entirely different direction. The researchers over at Apple have responded to this issue by giving an update which is set to correct the discrepancy caused by the first release. The interface is looking like its Android counterpart and is sure not to disappoint.


Google Play Music
Google seems to have been testing this for over a month and it has released its latest update to the Apple Platform with a one month free service to All access- Google’s own streaming service. The application is available for download in the App store.
Install Google Experience Launcher on your Android Device

Install Google Experience Launcher on your Android Device

Google’s launcher which integrates the Google Now is officially available to Nexus 5. Its not available officially yet, for other devices. But, don’t be sad, here is a trick that will help you to install the launcher for your device!
But before that what is so special about this?! The Google Experience Launcher is “always listening,”. Which means, you can simply trigger it to do any action by saying “OK Google”. This phrase works, whenever you are active on your home screen (this is when the launcher actually listens). Also remember that your device will not send any voice data to Google, as all the voice processing happens on your device only.
Your Android device might already have the Google Experience Launcher installed, yes!, as the entire code is almost contained in the official Google Search app. And you very well know, that the Google Search app is included on all Google-certified Android devices and configured for auto-updates. This Launcher is capable of running on devices running Android 4.1 or newer.
Ready, now , how to get this installed?
Step 1 : Go to “Settings” then to “Applications”.
Step 2 : Find “Unkown Sources” (allow installation from non market applications) and enable the Check box.

Step 3 : Download  com.google.android.launcher file from Android Police and install the apk file.
Step 4 : Tap the home button to choose Google Search Launcher as your new launcher.
Step 5 : Remember to choose “always” as the action.
Now, you can simply say “OK Google” and start searching or perform a voice action.
Know the top commands you could use with the launcher! – List Of Google Now Voice Commands
Copyright © 2012 DzireZOne All Right Reserved
Designed by Pirate Rex