Breaking News
Loading...

Recent Post

Showing posts with label Android Application. Show all posts
Saturday, April 12, 2014
Find your lost Android device with Android Device Manager

Find your lost Android device with Android Device Manager


Find your lost Android device with Android Device Manager :-
Your Android Smartphone have all important contacts, emails, personal images and many other important things. Have you ever think about what happened when you lost of your phone or someone stolen your android phone ? Your valuable information is in the other hand. However in my previous article i wrote about How To Encrypt Your Android Phone but this thing is not the full solution.
if you lose your Android device associated with your Google account, you can use Android Device Manager to remotely locate and factory reset your phone or tablet.
Open your Google Settings in your Android phone.

Now tap on the Android Device Manager.

now it will open your Android Device manager windows. After Enable this option, you are able to Erase all your data , Change the Screen-Unlock Password and Lock the Screen. Click on the Activate option to activate this option in your Device.

Now choose both option “ Remotely locate this device " and "Allow remote lock and factory reset” .

Sign in to your Google Account on https://www.google.com/android/devicemanager. If you’re using a Google Apps account, you will sign in to your My Devices page.

Presently i am in Bhubaneswar (India) and it's showing my correct location on my android device manager.
Now here i have the option to Ring my Device for five minutes in full voulme , Lock and Erase my device data.
Tuesday, February 25, 2014
Get Timely Notifications When Your Facebook friends are online!!

Get Timely Notifications When Your Facebook friends are online!!


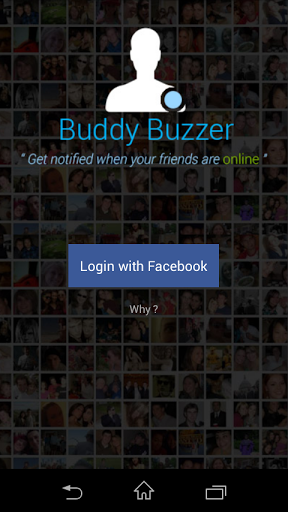
Buddybuzzer

Description:
Never miss a chat with your Loved One's again. Buddybuzzer is a fun social app which keeps track of online activity of your Facebook friends. You get timely notifications when your dear ones are online.
IN YOUR LIFE:
★ Get rid of frequent checks on messenger, we'll take care of that
★ Concentrate on your work, those are important too
★ Your concerns are only yours. We've perfect ways to keep it that way
★ Take a break with confidence, we've got you

KEY FEATURES:
★ Favorite friends — Mark your dearest friends
★ Ring Notifications — Make your phone ring when your special ones are around.
★ Personalization — Set aliases for your friends so that only you get the notifications right
★ Control — Choose when to monitor and when not to

Screenshots:


DOWNLOAD 

Saturday, February 22, 2014
WhatsApp now lets Android users hide their 'last seen at' timestamp. Here's how

WhatsApp now lets Android users hide their 'last seen at' timestamp. Here's how

Popular mobile messaging application WhatsApp, that is now being acquired by Facebook, has included a much-requested feature - the ability to hide the 'last seen at' timestamp.
This feature was so longer available only on WhatsApp for iPhone and was a much desired by many on other platforms who do not want to display to other users information about when they last used the app.
Users can now choose if they want to display their last seen status to everyone, only to their contacts or to nobody.

The new WhatsApp update also includes the ability to limit visibility of profile photos and status.

The new update also includes the ability to limit visibility of profile photos and status.
The update that includes these features isn't, at the time of posting this, available on Google Play but WhatsApp is expected roll this out soon.
If you wish to get the new privacy features on WhatsApp, go to the WhatsApp official website and Download the Android app from there. You might have to change your Android security setting before able to install this.
Once you have installed the app, open WhatsApp, tap on settings from the menu, then go to Account and there you will find a new option 'Privacy' added atop other existing options. The new features can be used from within the privacy settings.
This also means that if you have chosen to hide your 'last seen at' timestamp, you will also be unable see others'.
Friday, February 14, 2014
Norton™ Mobile Security Free iOS / Android + 5 GB Cloud Storage

Norton™ Mobile Security Free iOS / Android + 5 GB Cloud Storage


Norton is Offering FREE Mobile Security for Mobile Device , Android & iOS , Just Select 1 Yr License worth Rs. 580 FREE . Also you have to add your credit card details but don't click on non renewable license option. You can also Get 5 GB Norton Cloud Storage FREE from Norton Zone 
How to get Norton™ Mobile Security Free IOS / Android  + 5 GB Cloud Storage :
​​Product Details :
  • Powerful protection for your mobile world and the Stuff in it
  • Compatible with Android™ smartphones and tablets, iPhone® and iPad®
  • Instantly pinpoint your missing device on a map to help you find it fast
  • Back up and restore your contacts across your devices
  • Help protect Android devices against potential privacy risks, malware and phishing
Friday, December 6, 2013
How to Installing BusyBox on Non-rooted Android Devices

How to Installing BusyBox on Non-rooted Android Devices


Today in this post i am going to discuss about how to install busybox on non-rooted android devices.  If you have a rooted android phone and utilizing it to the fullest, then in all probability your device is generation before non-rooted android device.  As a matter of reality, majority of android users are having non-rooted device and positively this snatch the chance to use BusyBox on your android device. BusyBox allows you to more additional linux commandson on your android devices. Busybox provides many unix tools in a single file. It runs during a type of POSIX environments like UNIX (including Android), FreeBSD and others, like kernels, though several of the tools it provides square measure designed to figure with interfaces provided by the UNIX kernel..!

Cover art


Requirements :
  • 1. Android device running on version 1.6 or higher
  • 2. Download BusyBox Non-Root App on your android device

Downloading and Installing :
After download & Installing this BusyBox Non-Root App, you need to follow these below steps,

  • Step 1) First of all, open this app.
  • Step 1) Click on Install Busybox and you need install all files include binary files.
  • Step 3) After installed, click on Busybox location and it'll copy the path to your writing board to form it simple for you to induce to them.
  • Step 4) Now open your Terminal and alter directory to the path you have copied.

[[APP]]2Lines for WhatsApp ★ ROOT

[[APP]]2Lines for WhatsApp ★ ROOT

Description
*** THIS APP NEEDS ROOT PERMISSIONS ***
Do you have several mobile phone numbers? Do you own two Whatsapp accounts and carry them on different cell phones?
Two Lines for Whatsapp allows you to use Whatsapp with different mobile phone numbers on the same device!
2 Lines for Whatsapp will save every Whatsapp account info you have and restore it automatically when you switch from one to another without needing registration or waiting for SMSs every time.
USE ON YOUR OWN RESPONSIBILITY!! Chorrasoft won't take responsibility for any lost or corrupt data on your Whatsapp app.

SCREENSHOTS:


Video:

How to Use Simultaneously Wifi and Mobile Data for Faster Download

How to Use Simultaneously Wifi and Mobile Data for Faster Download


Today, i'm talking about how to use simultaneously Wifi and Mobile Data for Faster Download.

if you are just not satisfied with the internet speed you are getting from your service provider and do you want feed up of your WiFi/3g/4g connectivity? As a human mentality, we always need more and more and the bandwidth we are getting from service providers is no exception to it. Some or the other day, you might have thought of using Wifi and mobile data simultaneously. Isn’t it? Probably Yes. As you know, generally it’s not possible because as soon as you turn on your WiFi connection, your mobile data got disabled.

Before you begin, you need :

  • 1. A Rooted Android device version 2.2 or up. 
  • 2. Super Download app installed on your device.Download free form Google Play Store.
How to Use Simultaneously Wifi and Mobile Data for Faster Download:

  • 1. Just click on a link or open a remote file: if the file type is recognized by Super Download, it will start getting it. 
  • 2. If this method doesn't work, try click-and-hold on the link, select “share with” and choose Super Download. 
  • .3 Finally, you can copy and paste a URL in the “add URL” dialog. You are now all set to speed up your download.

Things to Remember while Using the Application:

  • 1. Using both networks together requires root access (remember to say “authorize” to the superuser prompt).
  • 2. Since this program uses mobile data connection, by using it you may incur in additional charges from your network operator.
  • 3. To unleash its full potential, this turbo downloader needs good (and balanced) wifi and mobile reception/bandwidth. If you have good wifi internet, 2G mobile is not enough, you need 3G or 4G.
  • 4. Using both connections is not supported on all devices / rom combinations.
  • 5. Some web servers may provide insufficient functionalists on the requested files.
  • 6. Currently only http and https protocols are supported (no ftp or torrent yet)
  • 7. The Lite version has a file size limit of 50 megabytes.
Monday, December 2, 2013
Install Google Experience Launcher on your Android Device

Install Google Experience Launcher on your Android Device

Google’s launcher which integrates the Google Now is officially available to Nexus 5. Its not available officially yet, for other devices. But, don’t be sad, here is a trick that will help you to install the launcher for your device!
But before that what is so special about this?! The Google Experience Launcher is “always listening,”. Which means, you can simply trigger it to do any action by saying “OK Google”. This phrase works, whenever you are active on your home screen (this is when the launcher actually listens). Also remember that your device will not send any voice data to Google, as all the voice processing happens on your device only.
Your Android device might already have the Google Experience Launcher installed, yes!, as the entire code is almost contained in the official Google Search app. And you very well know, that the Google Search app is included on all Google-certified Android devices and configured for auto-updates. This Launcher is capable of running on devices running Android 4.1 or newer.
Ready, now , how to get this installed?
Step 1 : Go to “Settings” then to “Applications”.
Step 2 : Find “Unkown Sources” (allow installation from non market applications) and enable the Check box.

Step 3 : Download  com.google.android.launcher file from Android Police and install the apk file.
Step 4 : Tap the home button to choose Google Search Launcher as your new launcher.
Step 5 : Remember to choose “always” as the action.
Now, you can simply say “OK Google” and start searching or perform a voice action.
Know the top commands you could use with the launcher! – List Of Google Now Voice Commands
List Of Google Now Voice Commands

List Of Google Now Voice Commands

Google has integrated Google Now to Andriod KitKat’s 4.4 update. So now you should be able to use this personal assistant by swiping to the left and also use voice commands to make most of the things without touch your phone! This feature is available to Nexus and Moto phones until now.
So, if you own one such mobile just click on the microphone to try out these voice commands. But do you know all the commands?! Okay, here we are to help you with top 60+ Google Now voice commands, put in a “Google Now style”.

Also, Google has unveiled a new Beta Chrome extension - Google Hotword search today, that brings this mobile feature your desktop! This automatic voice search is live  for users in U.S. English and will be triggered whenever you say the phrase “OK, Google”. As long as you have the extension installed, you can just say “Ok, Google” to make the search. Try now!

Wednesday, October 2, 2013
MyDroid System Info – Review

MyDroid System Info – Review


Built in Holo, an application to view all your system info, in an easy to see and understand manner. We know Google Play is swamped with note, alarm and file manager apps built using Google’s recommended guidlines but MyDroid is worth checking out too…
A system information viewer, system resources monitoring, real-time sensors monitoring, logs viewer.
This version supports
- Device and OS overview
- Display
- Storage
- Cameras
- System resources monitoring (CPU, RAM, battery, storage, network)
- Sensors monitoring in real-time
- Logs viewer (logcat)


That advert can be removed with purchasing a different version of this application but that isn’t easy to find in-app. (We only found this out by searching a little more on Goggle Play) We’d be more than happy to recommend the free version to test first then do a search yourself for the option to remove. It would have been better to provide a link inside the app but unfortunately, that isn’t the case here.
Wednesday, August 14, 2013
[[APP]]Total Commander || The First Ever Dual-Pane File Manager For Android

[[APP]]Total Commander || The First Ever Dual-Pane File Manager For Android

Although there are quite a few file explorers available in the Android Market, none of them come with dual-pane support for easy file transfer/management of device directories. But the wait seems to be finally over for Android users because Total Commander is closing in on its official release. Total Commander is a handy file explorer that can be lauded as a first-of-its-kind effort in Android spheres as it brings the concept of dual-pane file exploring on your smartphone/tablet along with some of the most sought-after file management tools. Update: Total Commander is now available on the Google Play Store. Link added at the end of the post.

[Image: CWLn5tTUoMxxOWtpYQutQegd4b0OC52LOnSMP2T4...vw=h500-rw][Image: _qDF2tsq5WBU-J25n21t6DS5hPJY7IHLgTVCCV9x...Yw=h500-rw][Image: CMv4_HRXlatwGGmLKwhuhrpO4hnls4A6lyKxYt8b...jY=h500-rw]

Since the good old days of dual-pane file explorer programs for desktop operating systems, users have become accustomed to using similar interface for efficient and quick file transfer and management among various directories. So far though, Android users had to resort to single-pane file explorers on their devices to maneuver files and folders – something that demanded ample time to switch between source/destination directories. The hectic and tedious routine demanded a change that has finally been provided by Total Commander. The app opens to a home screen packed with multiple features and shortcuts to the most frequently used folders including the SD-card folder, photos folder, downloaded files, file system root and installed apps folder. Dual-pane option is available in both portrait and landscape orientation but its usage is bit different for each mode. When viewed in portrait mode, users can switch between panes by tapping on the three arrows appearing at the top-left or top-right portion of the screen, depending on which pane is being viewed. Or, they can simply swipe left/right across screen to toggle between panes. The two ‘equal (=)’ signs can be tapped anytime to view exactly the same directory in both panes for easy file sync.

[Image: nBg2bgsSx4E70kn_iRtd8T13P8PyfM3TQAfOQamT...T4=h500-rw][Image: KQnXla5GZnLcVVf_YjioGDN6dqNw07RsBcgwqWT4...Ug=h500-rw][Image: 3BTIddlB8wThZZFR0DvboMPPDTvltdHmix4enqYE...xk=h500-rw]

However, it is the landscape orientation that allows users to avail the dual-pane feature of Total Commander the conventional way (side-by-side). Users can easily make a pane ‘active’ by tapping on the preferred pane or by tapping on the arrow provided in the task bar below. File selection in Total Commander is even easier. Tap on the icon/thumbnail of a file to select it. You can select multiple files at once in this manner. To open a file, just click on its filename. After selecting preferred files, users can perform routine file management functions such as copy, move, rename, delete, paste and create a new folder.
Moreover, Total Commander supports APK file handling, multiple languages, encrypted ZIP and RAR files, built-in text editor, one-tap home screen access, integrated help, full-screen without the notification bar, advanced search tools, configurable task bar with host of options and much more. Selected files and folders can be copied or moved by feeding in the destination directory manually or via in-app directory list. Total Commander also supports files/folders sharing via Bluetooth.

[Image: cw1ivUfXzVO3tW0RB2ZggL-u1dxIF2EMBfX4N0tE...BG=h500-rw][Image: U1oA7OSGA03aqscZFXZmLkyfo4hzdmPGgmF5iOzw...B8=h500-rw]

Going through the comprehensive list of features present in Total Commander, one is left to wonder why it isn’t being given more attention. Well, one reason could be that the app is yet in beta and hasn’t been released to the Market. To download the app’s APK or to gain detailed info on its features, head over to the developer’s website. To install the APK on your device, go to Settings > Applications and check Unknown sources. You may now proceed with APK installation by following on-screen instructions.
[Image: zAh4FI9fQsrxlNCwzW4C75VUaq6wWvQI_qfAw66l...xTA=w60-rw]
Download Total Commander for Android
Tuesday, July 16, 2013
Greenify : Improve speed and battery life of your Android device

Greenify : Improve speed and battery life of your Android device


[Image: 1.jpg]
Today I’ll talk about an app that will help you to improve the speed and battery life of your Android device when you have a lot of concurrently running apps : Greenify.

One of the most common problem experienced by Android‘s users is probably related to lag when the number of installed apps increase.
This issue is not very common when you start to use your smartphone for the first time, but grows over time.
The source of the problem is seldom caused by lack of optimization in the Android OS. In fact, in most cases, it’s just because some of the apps installed are abusing your smartphone resources while running in background.
How often do you see apps running in background even if you are not using it? How often are they not doing anything important for us?

Task killers are one solution, but that is just a stop-gap measure that won’t fix the real problem in the long run.

Android generally keeps apps in memory to make it faster to reopen them at a later date and it clears the memory only when absolutely required.

A task killer would merely temporarily free a bit of memory, but in many situations Android will reopen the apps again after a while.

The process of opening and closing apps is a terrible waste of battery.

The best way to solve the problem is to tell the Android OS not to open that app in the first place by using the “hybernate” flag. That will keep that app completely closed without wasting precious battery life.

That’s where this great application called Greenify comes in, but unfortunately it requires root permissions on your smartphone in order to run.

There are plenty of guides available on the internet about how to gain root permissions for your smartphone, just give a search by specifying your particular smartphone model.

After you install and run the app you’ll see a very simple UI :
[Image: yEF4WV1SnY4tNmiMS42OTAYuEKgNw6R8AB08TNzb...1A=h500-rw][Image: uKeexTmQ6ci1Ddv5wDcOzF01zr_ql-rxjvMf_ce0...1o=h500-rw][Image: NyBtGEYnbjNi5sY2puz3aOqLVY7ZwrvYxJU9YHjj..._A=h500-rw]

Now you can force your apps to “hibernate” by tapping on the + sign and selecting the option from the list.

As you can see Greenify will try to help you understand which apps can possibly create issues by giving you additional details of what the app is doing in background.

The hibernated app can be used normally, but remember that for some particular type of apps this may compromise its normal usage.

For example apps like Facebook Messenger or Hangouts won’t be able to send you notifications at all while hibernated. Remember to choose carefully what to hibernate.

I tried Greenify on my Samsung Galaxy Nexus and I can assure you that it improve a lot the performance and reactivity of the smartphone.

Download Free Version From PlayStore
Download Paid Version From PlayStore

For Pro version For FREE Visit DzireZOne,DzireZOne is providing it for free..just for DzireZOnes Members:

Follow this link http://goo.gl/3S48P
Saturday, June 29, 2013
Download Android 4.3 Camera App APK With New Interface

Download Android 4.3 Camera App APK With New Interface

Yesterday, Google – in association with Samsung and HTC – released the Google Play editions of the Galaxy S4 and HTC One. Hardware-wise, these phones are exactly the same as their skinned counterparts running Touchwiz/HTC Sense, but it’s the software side where things get really interesting as these devices eschew proprietary skins for stock Android 4.2 Jelly Bean. Technically, this isn’t 100% pure stock Android 4.2, as it includes the updated camera app that is supposed to be a part of Android 4.3. Thanks to the Android enthusiasts’ community, this new camera app is now available for other Android devices as well. Details after the jump!
The camera app running on Google Play editions of the S4 and One has a thoughtfully tweaked user interface. The radial menu that previously showed customization options both above and below the point of input, now shows them above said point only. This makes good sense since in the previous version, the bottom row of options would get hidden by the user’s thumb. You can see the difference in the comparison below:
As you can see, you now get controls placed in a better layout and position, and tapping expandable controls shows you the underlying next level of controls in the same manner as well.
In addition to the new user interface, the app also allows you to snap photos using the Volume control buttons. If the new user interface doesn’t give you enough motivation for you to install the app, this small but immensely useful feature surely will.
If you are interested in testing the new Camera app out, you are in luck! The ever-vibrant Android community has been able to extract the app from one of the Google Play edition smartphones, and has released it online.
To install the app, download the app’s APK from the link provided at the end of this post, and install it as you would normally install any APK (after enabling ‘Unknown sources’ from Settings > Security). On Nexus devices, this will replace the Camera and Gallery apps while for other smartphones, the app will install normally alongside all your other apps. One last thing you should know: we have seen reports online of this camera app causing Photosphere to stop working for some people, so keep that in mind before you install the APK. On the bright side, you can always uninstall it by going to Settings > Apps > All, selecting Gallery and tapping ‘Uninstall updates’ to roll back to the previous version.
Of course, if you prefer the official thing, you will either have to grab one of the Google Edition phones, or wait till Android 4.3 makes its way to your phone. This new UI was first showcased when a Nexus 4 was spotted running Android 4.3 with the camera app open at a mobile expo in Thailand.
If you do try out the new camera app, be sure to let us know how it worked out for you by leaving a comment below.

DOWNLOAD

Copyright © 2012 DzireZOne All Right Reserved
Designed by Pirate Rex